Are You & Your Horse Ready For Bitting Advice? The Steps You Need To Consider First
Equestrian Advice & Guides All Disciplines
Build your business profile for FREE and expose your services to thousands of potential clients!
Create my profile now!
For many riders, a dressage lesson itself is often too boring. Practicing a prelim test over and over again, or trying to get a horse into an outline that may be a little older or stiffer is not fun, it can feel more like torture. And for the instructor, it's also not easy to come up with something that makes the lesson more fun and, in addition, improves rider and horse. And honestly, standing in the middle of the school and repeating the same thing over and over again is just as boring. That’s why I always try and make my lessons more fun. I will use poles, cones, balls, Pilates bands, sponges... There is so much inspiration to be found in books and on the internet.
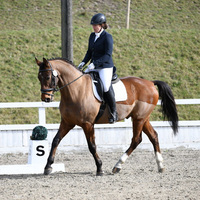
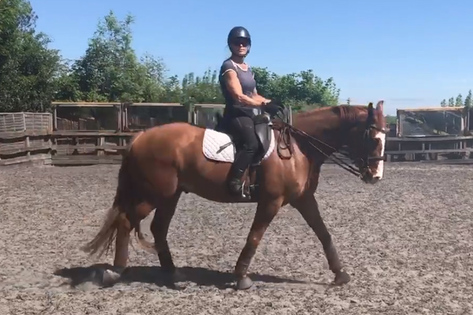
One of the first exercises a rider learns is a 20m circle. It's in every dressage test and is such an important fundamental exercise that lots of work will be based upon it. But to be effective, you have to ride your circles correctly.
When I ask a less experienced rider to ride a turn, his/her first reaction is usually to pull the inside rein. Riders think that if they manage to pull the horses head around, the rest of the body will follow. A finer, more sensitive horse might allow this to happen, but mostly horses just tense up and keep going straight. A horse cannot be bent in the middle. Don’t forget that it’s a 500kg animal and he cannot read your mind. He doesn’t know that he is supposed to react to your pull on the rein by correctly bending and fluently turning. And why should he make an effort and bend in the ribs and back, when it’s a lot easier to just lean on the rein, set the neck and move the haunches to the other side. The horse does not know that bending will help to supple him and improve his balance. He did not read the book.
Riding a good turn is not easy. Horses have a tendency to fall out over the shoulder or with the haunches, simply because they lose balance. Riders, instead of helping, sit crookedly, pull the reins and just generally give the horse opposing information.
To ride a circle the horse has to bend along the line of the circle. The rider has to:
As you can see there is a lot to remember and this is just a basic description, it could be taken apart a lot more. So how are you supposed to remember it all and do everything in the right moment?
Let's use poles and cones to help.
Such a difficult exercise. Only few can ride it correctly and understand how it improves “throughness” of the horse. Many just ride it “somehow”, mostly resembling an egg, not a circle. The problem is that it then becomes useless. On a correctly ridden circle the horse is constantly bending. It goes regularly and with that gets a good RHYTHM. They relax and become SUPPLE and then come into a steady CONTACT. This is how we get to the Scales of Training, and so improve suppleness and “throughness”.
 You can't just guess where the circle is, you need to know exactly!
When we look at the circle, you can see that it is a circle in a square 20m x 20m. You can see in the picture, that the circle touches the square in 4 places, always 10m from the corner. So, we ride from one circle point to the next one. We never ride into the corners; we don’t even touch the letters H or M (or F and H).
A lot of people like to learn using visual aids, so it helps to mark the circle out. I put poles into the corners. If the rider passes the poles from the outside, s/he will be riding a square. If s/he passes on the inside, it will be a circle. The rider will quickly realize how much steering has to be done to get from one circle point to the next one. To help the rider not to cut the circle off, I also put cones at each circle point.
In the beginning this can all be quite difficult, especially if the horse is less easy to bend to one side. But horses get used to it quite quickly. Because they know where to go, they will soon begin to relax and find it easier. By correctly riding a circle, I can check if my horse bends equally to both sides, if he falls out over the shoulder or pushed his quarters in or out. If I ride the circle just somehow, I might not even notice these mistakes. We only find out that we have a problem later on when we try and ride a more difficult exercise, for example shoulder in. The horse might tilt his head and we won't know why. It is so important to get the basics right. When the horse manages to correctly stay on a circle on both reins, he will manage more demanding work later.
When the rider understands how to ride a circle, we can continue with more exercises.
 I put cones 1m from the circle points and then another one every 2m (see picture).
When I ask riders to spiral in and out on a circle, often this happens: the rider moves into the middle of the circle, runs me over and then rides out again. For this exercise to have some effect, it’s necessary to keep a regular bend, keep a regular rhythm, the horse needs to stay relaxed and the contact has to not change either.
Start riding a 20m circle. When the horse does this regularly and is relaxed, we can make the circle smaller by 1 cone on each side. We stay on this smaller circle, until the horse is settled again. Then we can make the circle smaller by 1 cone again. Now the circle is only 14m, so we can't stay here too long, it gets hard on the horse's joints and tendons. More advanced riders can make the circle even smaller; the smallest should be an 8m circle. Then we can make the circle bigger again, nice and slowly, one cone at a time.
You can ride this exercise in walk, trot and canter and on both reins. It's good to freshen up the pace in between, ride a straight line, nicely forward.
This exercise benefits the rider too. By looking in the direction you are going, you will put your head, shoulders and upper body in the correct position without thinking about it too much. Your shoulders should be parallel with the horse's shoulders. Your hands are near the whither, each hand stays on its side. Making the circle smaller teaches the rider how to lead a horse on a curved line. It helps to imagine, that you are riding through a tunnel and you have to keep your horse in that tunnel: a little more weight on the inside seat bone, your inside leg has to bend that imaginary tunnel along the line of the circle. Your outside leg needs to watch, that the horse back doesn't fall out of the tunnel. Your inside rein also bends the tunnel, but has to not break it. Your outside rein helps to make sure that the tunnel doesn’t break. Otherwise it would look like a big lorry turning; the front part turns but the trailer continues straight.
 Cones can also help with riding transitions. When the rider can see where she is supposed to ride a transition, s/he is more likely to prepare the transition in time.
You can use cones to teach to ride different size circles. Put them so you can ride a 15m, 12m or 10m circle around them (see picture).
Don’t forget to change the rein often and ride forward on straight lines in between. I hope you have fun and thanks for reading! I will talk about loops and serpentines next.